
놀고 있는 노트북에 젠킨스를 설치하기 위해 아래 공식 문서를 참고했습니다!
LTS 버전으로 진행했습니다!
1. jenkins debian packages 사용을 위해 시스템에 키를 추가합니다
# 키 등록
curl -fsSL https://pkg.jenkins.io/debian-stable/jenkins.io.key | sudo tee \
  /usr/share/keyrings/jenkins-keyring.asc > /dev/null

# 키 등록 확인
sudo apt-key list

# [결과]
uid           [ unknown] Jenkins Project <jenkinsci-board@googlegroups.com>
2. Jenkins apt 저장소 항목을 추가합니다
echo deb [signed-by=/usr/share/keyrings/jenkins-keyring.asc] \
  https://pkg.jenkins.io/debian-stable binary/ | sudo tee \
  /etc/apt/sources.list.d/jenkins.list > /dev/null

# 입력 확인
$ cat /etc/apt/sources.list.d/jenkins.list

# [결과]
deb https://pkg.jenkins.io/debian-stable binary/
3. 로컬 패키지 인덱스를 업데이트 한 후 jenkins를 설치합니다
sudo apt-get update
sudo apt-get install jenkins
[jdk8? 11? 17?]
jdk8의 경우 22년 9월 LTS 릴리스까지 지원이 되기 때문에 .
jenkins 2.357부터는 java 11 또는 java17이 필요하다고 나와 jdk는 17로 진행했습니다!!
4. 포트 변경
젠킨스의 기본 포트는 8080입니다
# -ano : 모든 포트를 IP주소: 포트 형태로 보여주고 PID도 표시해준다
netstat -ano | grep 8080
저 같은 경우 8080을 이미 사용하고 있어 9090 포트로 변경해보겠습니다
systemctl edit jenkins

[Service]
Environment="JENKINS_PORT=9090"
/lib/systemd/system/jenkins.service 설정 파일에서 port를 설정할 수도 있습니다
만약 /lib/systemd/system/jenkins.service 설정 파일을 변경한다면
sudo systemctl daemon-reload 명령어로 편집한 설정 파일을 반영해줘야 합니다
5. 젠킨스 시작
# 젠킨스 서비스 활성화
sudo systemctl enable jenkins

# 젠킨스 서비스 시작
sudo systemctl start jenkins

# 젠킨스 서비스 상태 보기
sudo systemctl status jenkins

# 콘솔 로그 출력
journalctl -u jenkins.service
# 젠킨스 서비스 상태
● jenkins.service - Jenkins Continuous Integration Server
Loaded: loaded (/lib/systemd/system/jenkins.service; enabled; vendor preset: enabled)
Drop-In: /etc/systemd/system/jenkins.service.d
└─override.conf
Active: active (running) since Thu 2022-08-11 23:51:09 KST; 42min ago
Main PID: 205667 (java)
Tasks: 48 (limit: 9391)
Memory: 923.5M
CGroup: /system.slice/jenkins.service이렇게 나오면 끝!
그리고 해당 접속해보면 아래와 같은 화면이 뜹니다!
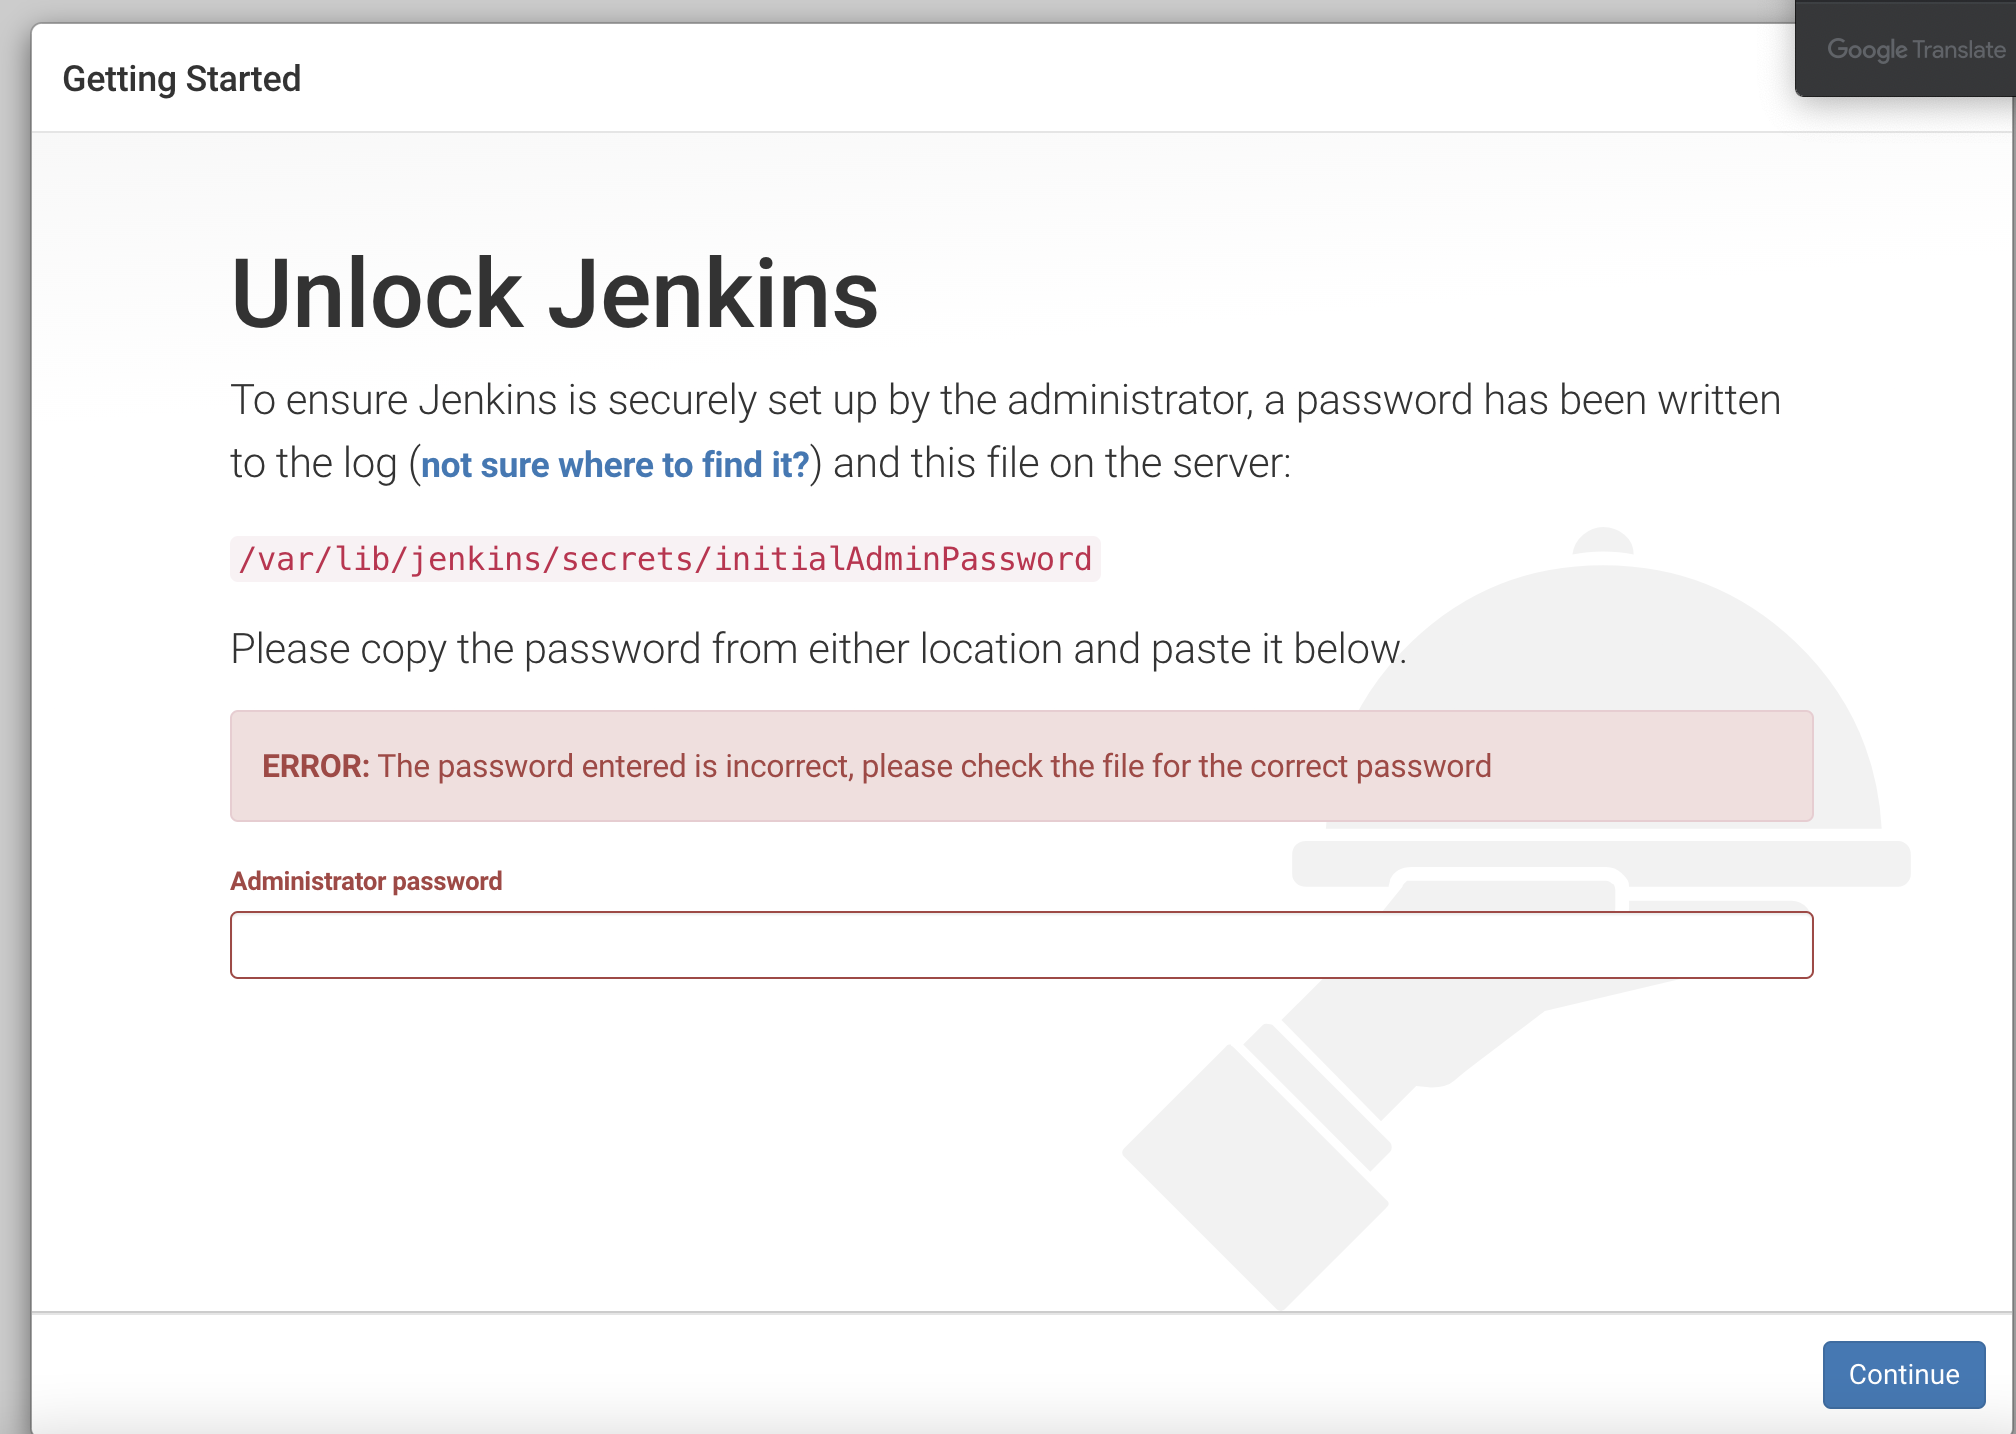
sudo cat /var/lib/jenkins/secrets/initialAdminPassword명령어로 비밀번호를 확인하여 로그인 완료!
[참고]
https://www.jenkins.io/doc/administration/requirements/jenkins-on-java-17/
Running Jenkins on Java 17
As with Java 11, you can start Jenkins using the java command: java -jar jenkins.war --enable-future-java
www.jenkins.io
https://www.jenkins.io/doc/book/installing/linux/#long-term-support-release
Linux
After downloading, installing and running Jenkins using one of the procedures above (except for installation with Jenkins Operator), the post-installation setup wizard begins. This setup wizard takes you through a few quick "one-off" steps to unlock Jenkin
www.jenkins.io
https://www.jenkins.io/doc/book/system-administration/systemd-services/
Managing systemd services
Beginning with Jenkins 2.332.1 and Jenkins 2.335, the Linux package installers use systemd to manage services. The RPM and deb package installers migrate configuration settings from System V init to systemd overrides.
www.jenkins.io
https://www.jenkins.io/blog/2022/06/28/require-java-11/
Jenkins requires Java 11
As noted above, members of the Jenkins community began working on Java 11 support in 2018, well before the present author’s involvement in the project and well beyond the present author’s ability to identify and name everyone who was involved in the ef
www.jenkins.io
'IT > 기록' 카테고리의 다른 글
| Nest (NestJS) CORS 설정 (1) | 2022.10.18 |
|---|---|
| [Flutter] ClipRRect Widget - 이미지 테두리를 둥글게 만들고 싶을 때 (0) | 2022.10.14 |
| [Flutter] Firebase Authentication을 사용하여 구글 계정 인증하기 (0) | 2022.08.10 |
| [Flutter] Flutter 앱에 Firebase 파이어베이스 설정하기 (0) | 2022.08.08 |
| 21년 12월 JAVA 보안 취약점 이슈와 API 보안에 대해 학습 (0) | 2022.08.04 |